
You can easily start to incubate chicken eggs at home to ensure getting healthier chicks. Whether you’re doing it as a fun project for your kids or a farmer to increase flock count, the end results will be quite rewarding.
The whole process usually takes 21 days. Keep in mind that it’s ok if your eggs start hatching a day before or after that’s completely normal. You need to remain patient and dedicated in order to achieve the best results.
In this guide, I’ll tell you all about an interesting process, how to incubate and hatch chicken eggs – just 21 days from egg to chicken.
Get the Right Incubator
First things first, you’d need to get an incubator. There are a few things that the incubator must have in order to ensure a correct incubation process.
Whichever incubator you choose, you must be able to set the temperature manually. Some incubators that are a bit cheap, the temperatures might not be completely accurate.
What I suggest you do is get a normal thermometer and test the temperature out first before inserting any eggs in the incubator.
When you’re buying an incubator you’ll find that the price starts from $50 and up. Some incubators may even go up to $1000. The prices depend on the size and features.

Choose an Appropriate Temperature Setting
You’d need to set the temperature to 99.5° throughout the whole process. A small change in temperature may ruin the embryo.
There’s also an option to build your own incubator. Although you’d be saving up some money, you’d be consuming a lot of time getting it done to the right standards house the eggs.
Adjust the Humidity Level
Setting the humidity will need to be changed once during the process incubation.
For the first 18 days, you’ll want to set the humidity somewhere between 40% and 50%. For any days remaining as long as the eggs didn’t hatch, you’ll change it to anywhere between 65% and 75%.
Incubators that are priced in the high range, will have better control over the temperature and humidity. In case you decided to invest in an incubator that is more budget-friendly, you can buy an external thermometer and hygrometer.
Make Sure the Incubator is Well Ventilated
Another essential when buying your incubator, you need to make sure it has ventilation. It needs to have holes in order to ensure that there’s fresh air coming into the incubator. The reason is that eggs have a porous shell, they take in oxygen and let out carbon dioxide.
Place the Incubator in an Optimal Spot
When you’ve finally received your incubator, you need to place it in an area where the temperature doesn’t keep changing. For instance, you can’t place it in the attic. Since the attic absorbs a lot of sun in the morning which leaves the area feeling hot and at night the temperatures will drop.
An ideal place would be a room that doesn’t have direct contact with the sun so the temperature won’t fluctuate as much. You are now ready to take the most important step to incubate chicken eggs.
Get a Fertile Egg
The next step would be obtaining a fertile egg from different resources depending on your own situation. For example, if you have your own chicken and there’s a rooster as well, you can easily take their eggs.
If you don’t have your own flock, you can get fertile eggs from online. There are a lot of websites and farmers that sell fertile eggs. You can also go to any farm and ask to buy fertile eggs from them.
Wherever you get your eggs from, try to have it from someplace that is near to where you plan to incubate those eggs. The reason is that long transportation may damage the embryos.
If you don’t already have a preferred breed, review this article for some helpful advice.
Choose the Good Eggs
When choosing the egg, you want to choose the ones that are the cleanest and are full in size. You should also make sure to wash your hands before touching the eggs and be extra careful when handling the eggs.
You should never wash the eggs as they have a coating that has essential nutrients to the embryo.
Let’s say you bought the eggs but you’re not ready to start the incubation process just yet. You can store the eggs in egg cartons for up to 10 days. Keeping the temperature between 50 and 60 with 75% humidity.
Place your fertile eggs with the fat side pointing up. If it’s stored the other way around, your embryo won’t stay alive.
Test the Incubator
Now that you have everything you need, what comes next is testing it out. Turn on the incubator and test it for 24 hours. You’d need to make sure that the temperature maintains the same as well as the humidity.

Taking time to prepare and review these details to incubate chicken eggs is essential for success.
Stack Properly to Incubate Chicken Eggs
A bit of advice I suggest you follow is to mark each side of the eggs with different shapes. For example one side you could write the number 1 and on the other side write the number 2. And of course, make sure the pen or marker you use is 100% safe for the eggs.
That is because you don’t want to mix up between the sides when you’re turning the eggs. You wouldn’t have to worry about that if you choose to get an incubator that comes with a turning option.
Monitor the Process
You need to check the temperature and humidity levels as frequently as possible to ensure nothing goes wrong. Turn the eggs at least 3 times a day. If you’ll turn it more, just make sure you do an odd number of turns.
You need to continue doing that for the first 18 days. Any day after that you shouldn’t touch the eggs at all.
Watch the Eggs Turn to Chicks!
The final step is to keep an eye on the eggs after the 18th day. Some might start hatching before the 21 days are over which is okay!
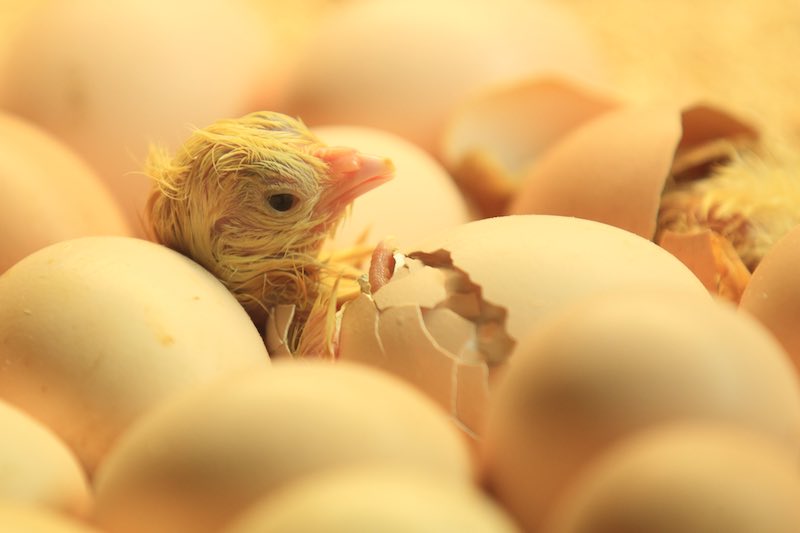
Chicks will break a small part of the shell with their beaks first. Don’t try to help them by cracking the rest of the shell. They’ll usually leave a small opening for a few hours in order to adjust their lungs to the outside air.
Move the Baby Chicken to a Brooder
Once they’re completely hatched leave the chicks to dry inside the incubator. You’ll then need to move the chicks into a brooder.

Conclusion
Planting your own food or raising it is a healthy new trend. It’s also quite satisfying and you can easily turn it into a family bonding activity.
Like all good things, this process needs some patience and dedication in order to get good results. The best part is that your patience wouldn’t exceed 3 weeks!
That was our best plan for how to incubate chicken eggs and watch them hatch. Just 21 days from egg to chicken!